MotrixSim Web Viewer#
This page explains how to use the MotrixSim web viewer, including how to load files, how to understand the file tree, what the top bar buttons do, and how to operate the viewer with mouse and keyboard.
Open the Viewer#
Open the MotrixSim web viewer page in a modern browser with WebAssembly support.
Simulation page URL: https://motrix.motphys.com/
After the page finishes loading, you will typically see:
A left-side file panel with
OnlineandCustomizeA central 3D viewport
A top bar with playback and scene control buttons
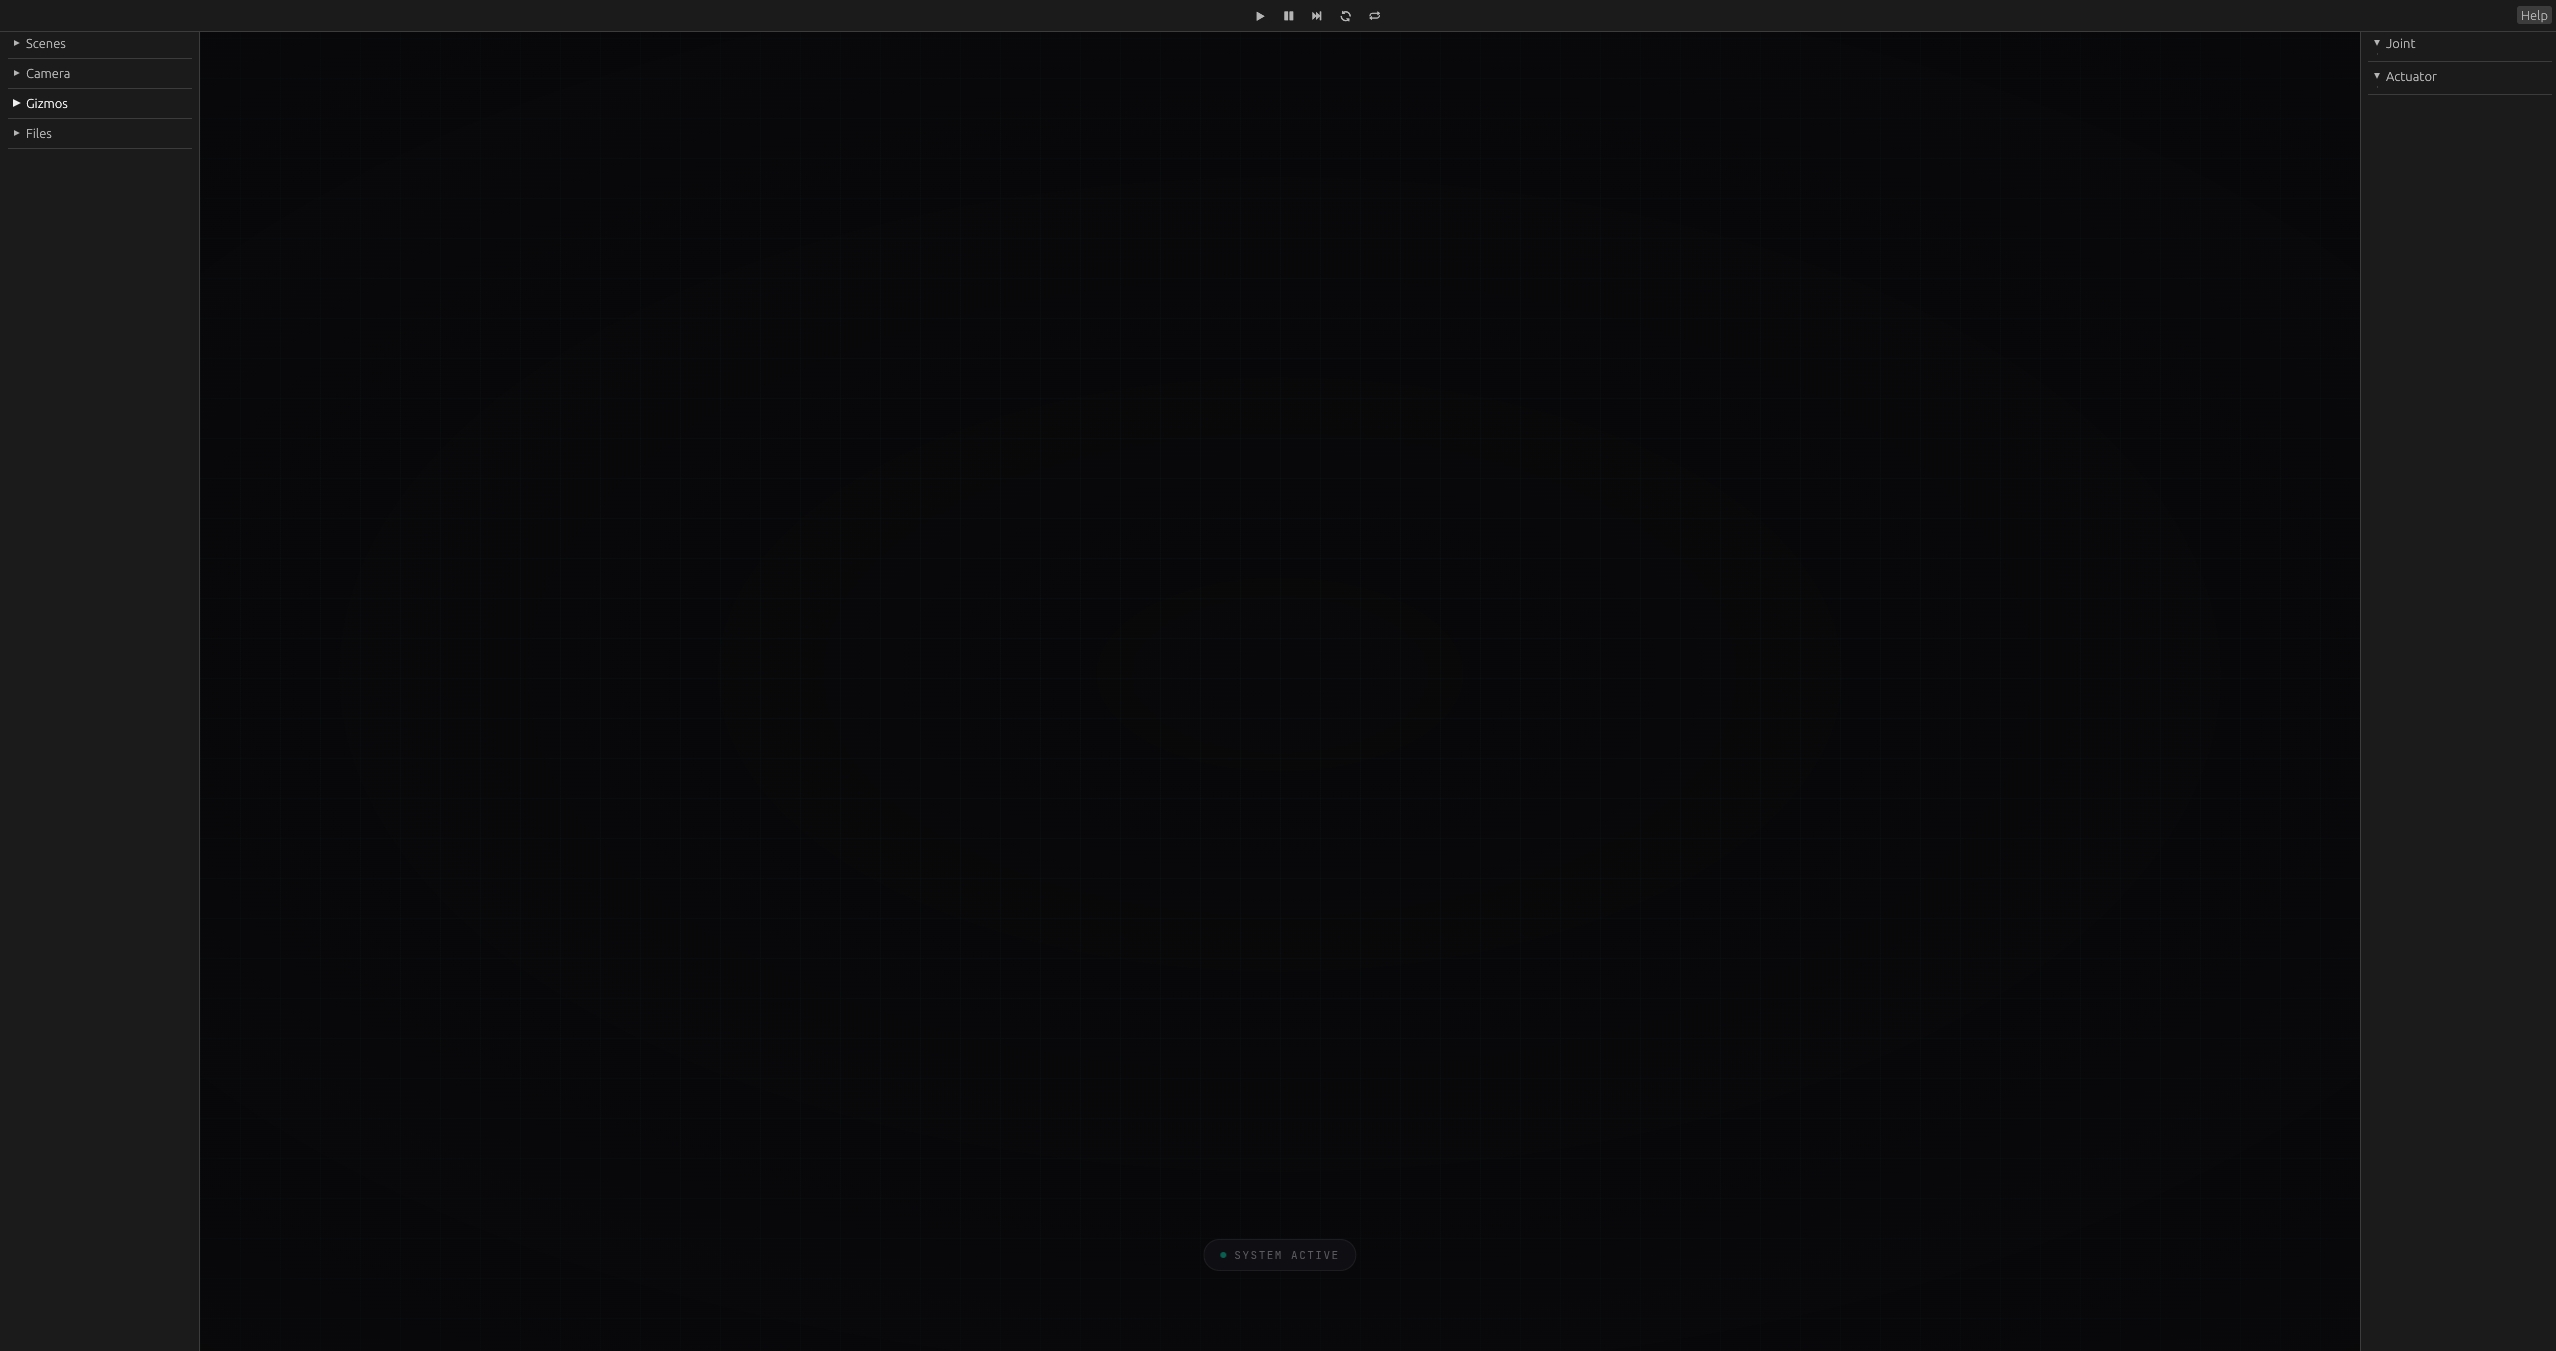
Overview of the MotrixSim web viewer, including the left file tree, central 3D viewport, and top toolbar.#
Load Models by Dragging a Folder#
On the web platform, the viewer cannot directly access your local file system like the native desktop app. The recommended workflow is to drag a whole model folder into the browser window.
Recommended Folder Structure#
The dragged folder should contain the scene file and all resources it depends on, for example:
boston_dynamics_spot/
├── scene.xml
├── meshes/
├── textures/
└── ...
How to Load#
Open the viewer page.
Drag the entire model folder into the browser window.
Wait for the files to appear in the left-side
Customizesection.In the file tree, click a scene file such as
.xml,.urdf, or.jsonto load it.
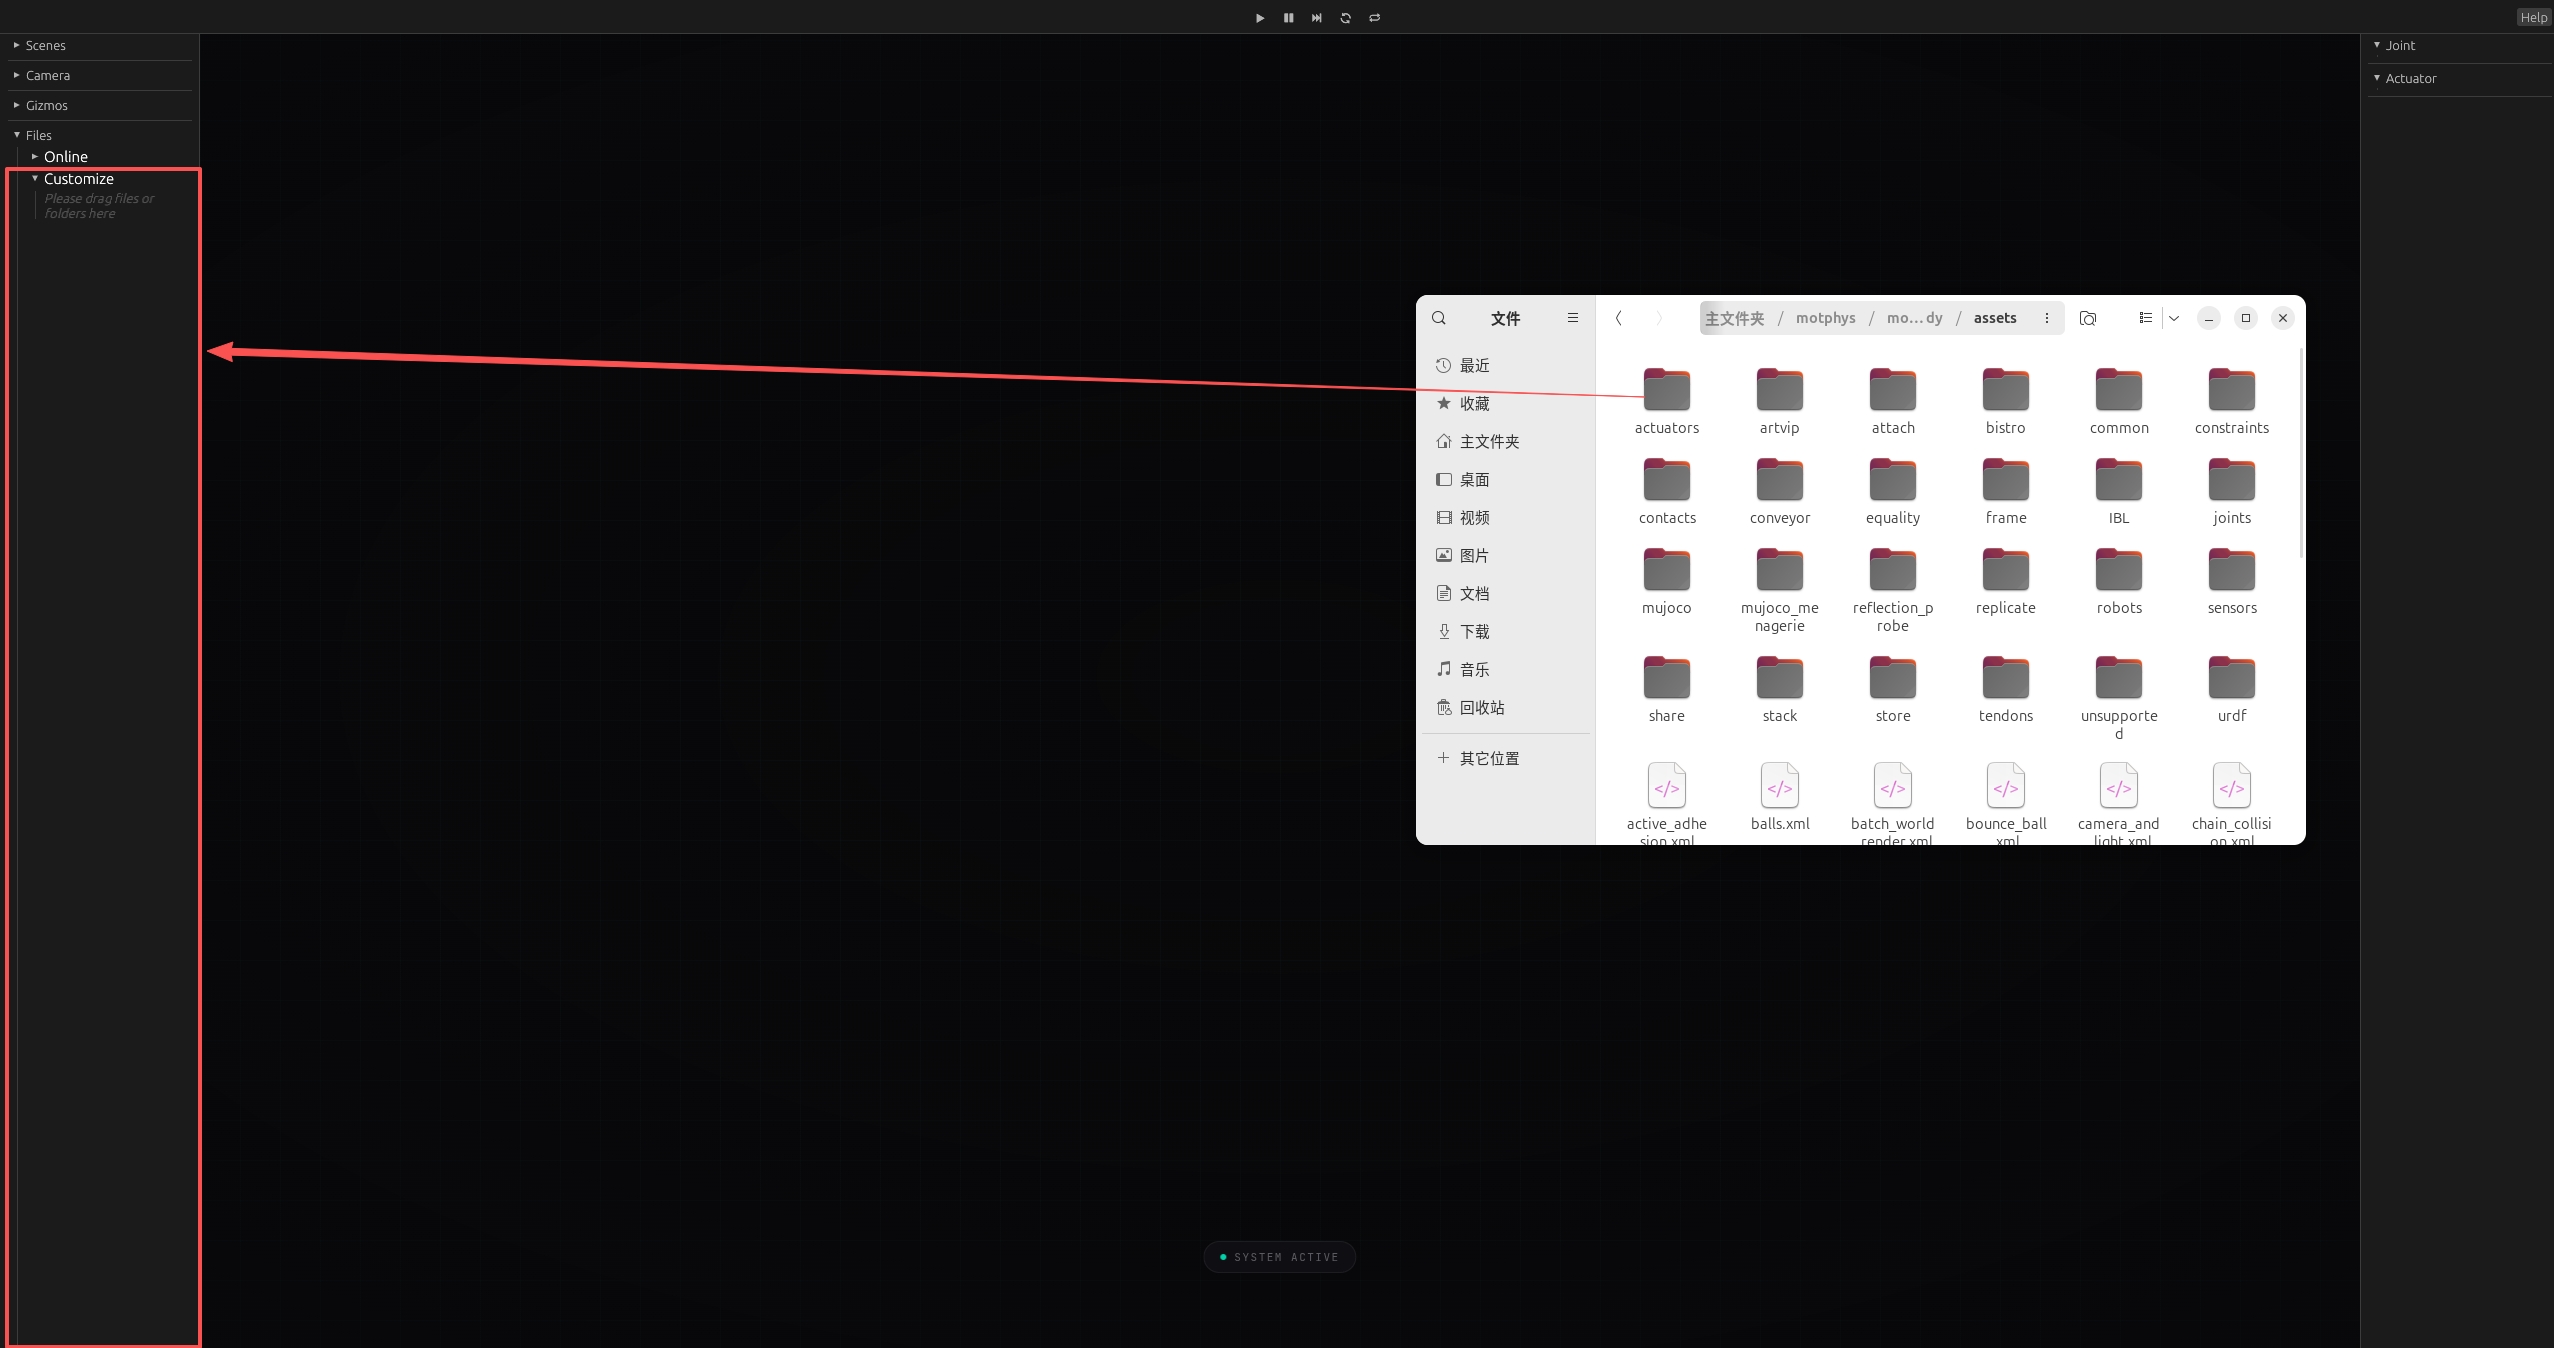
Drag the complete model folder, including the scene file and all dependent assets, into the viewer page.#
Note
Dragging the whole folder is preferred over dragging only the scene file, because referenced meshes, textures, and other dependent assets usually need to stay in the same relative paths.
Online vs Customize#
The left file tree has two data sources.
Online#
Provided by the deployed website
Read-only
Suitable for built-in demos and shared example assets
Files appear automatically after the viewer loads the online manifest
Customize#
Built from folders or files you drag into the page
Exists only in the current browser session
Best for testing your own MJCF, URDF, MSD, meshes, and textures
In short:
Use
Onlinefor bundled web examplesUse
Customizefor your own local assets
Load a Scene from the File Tree#
Once files appear in the left panel:
Expand
OnlineorCustomizeBrowse to the scene file
Click the scene file entry
Scene files are shown as selectable items in the file tree. Clicking one starts the asset loading pipeline and spawns the scene in the viewer.
Top Bar Buttons#
The top bar contains playback controls and scene utility buttons.

Common buttons in the top toolbar, including playback controls, scene controls, and the help entry.#
Playback Controls#
Play: start or resume simulationPause: pause simulationNext: step forward by one frame
Scene Controls#
These are the shared scene control buttons implemented in the viewer top bar:
Reset: reset scene state to the initial simulation stateReload: reload the currently loaded model file and its assets
Input Guide#
This section summarizes the most common mouse and keyboard operations when using MotrixSim.
Mouse#
Left mouse drag: orbit the camera around the scene
Mouse wheel: zoom in or out
Middle mouse drag or the corresponding trackpad gesture: pan the camera
Keyboard#
Space: pause or resume simulationF10: advance one simulation stepCtrl+E: reset the sceneCtrl+R: reload the current modelF11: toggle fullscreen when supported
Physics Drag Interaction#
If physics drag is enabled in the current app configuration:
Hold
CtrlPress the left mouse button on a draggable object
Move the mouse to drag the object
Example of physics drag interaction: hold Ctrl and drag an object
Typical Workflow#
Open the web viewer
Drag a complete model folder into the page
Click the scene file from
CustomizeUse the mouse to inspect the scene
Use the top bar buttons to play, pause, reset, or reload